There is something truly special about getting ready for a trip to the coast, you know, feeling the warm sun on your skin and the soft sand beneath your feet. It's that time when every little detail matters, from your favorite swim attire to, quite honestly, how your toes look. Having your feet looking their best, with a bit of color and perhaps a playful pattern, really just adds to that whole carefree, holiday feeling. It makes you feel put together, even when you are just relaxing by the water, which is that sort of simple pleasure we all look for.
Picking out just the right look for your toes when you are heading to a sunny spot can be a fun part of the entire getting-ready process. It’s like a little secret accessory that shows off your personality, even if only for yourself and those close by. You want something that feels light and airy, something that matches the bright, open feeling of the seaside. It should be a design that brings a smile to your face, perhaps a little splash of something cheerful, because really, that's what beach days are all about, aren't they?
So, whether you are planning a long vacation or just a quick escape to the nearest body of water, thinking about your toe nail designs for the beach is a nice touch. It's a way to carry that sunny mood right down to your very tips. We are going to explore some wonderful ideas that are just perfect for sandy toes, helping you pick out a style that feels just right for your next coastal adventure. It is pretty much about making sure every part of you is ready for some fun in the sun.
- Who Did Hannah From Below Deck Marry
- Wolverines Claws
- How To Start An Isp Service
- Sympathy Messages For Loss Of Father
- Natural Way To Dye Hair Black
Table of Contents
- Getting Your Toes Ready for Beach Toe Nail Designs
- What Colors Work Best for Beach Toe Nail Designs?
- Simple Yet Stunning Toe Nail Designs Beach Edition
- How to Make Your Beach Toe Nail Designs Last?
- Caring for Your Beach Toe Nail Designs After the Fun
- The Joy of Having Beautiful Beach Toe Nail Designs
- Choosing the Right Tools for Your Beach Toe Nail Designs
- Final Thoughts on Your Beach Toe Nail Designs
Getting Your Toes Ready for Beach Toe Nail Designs
Before you even think about putting on any color or patterns, it is a really good idea to get your feet and toes in nice shape. This step, you know, it makes a big difference in how your finished toe nail designs for the beach will look and how long they might stay looking good. Think of it like preparing a canvas for a lovely painting. If the canvas is smooth and clean, the art will just look better. So, basically, we start with a little foot pampering.
First off, a warm soak can feel incredibly good. Just a basin of warm water, maybe with a few drops of something soothing, can help soften things up. After a few minutes, gently push back those little skin bits around your nails, the cuticles. You do not want to cut them, just sort of guide them back gently. This makes the nail area look cleaner and gives you more space for your design. It's a pretty straightforward step, but it actually helps a lot with the overall look of your beach toe nail designs.
Next, it is about shaping your nails. You want to trim them straight across to help avoid any ingrown issues, and then you can gently smooth the edges with a file. Make sure they are not too long, especially for the beach, where sand and water can be a bit rough on longer nails. A smooth, even surface on the nail itself is also important. You can use a buffer block to gently smooth out any ridges or bumps. This helps the polish go on much more evenly and look, well, just nicer. It is a small thing, but it makes a significant impact on your toe nail designs for the beach.
- Ava Woods
- John Reed Discount
- Deceased Wwe Stars
- Wealthiest Cities In Southern California
- Does Wells Die In The 100
Finally, before applying anything, make sure your nails are completely clean and dry. Any oils or lotions on the nail surface can keep the polish from sticking properly. A quick wipe with a bit of nail polish remover, even if you do not have old polish on, can get rid of any lingering residue. This step is pretty much essential for a lasting finish. So, after all that, your toes are all set, ready for some lovely color and pattern for your beach adventures. It is quite satisfying, really, to have them ready.
What Colors Work Best for Beach Toe Nail Designs?
When you are thinking about colors for your toe nail designs at the beach, you want shades that feel light and bright, something that really captures the spirit of sunny days and clear waters. There are some classic choices that just always seem to fit the scene. Think about the colors you see around you when you are by the ocean. Those are often the best starting points. It's about bringing that outdoor feeling right to your feet, you know?
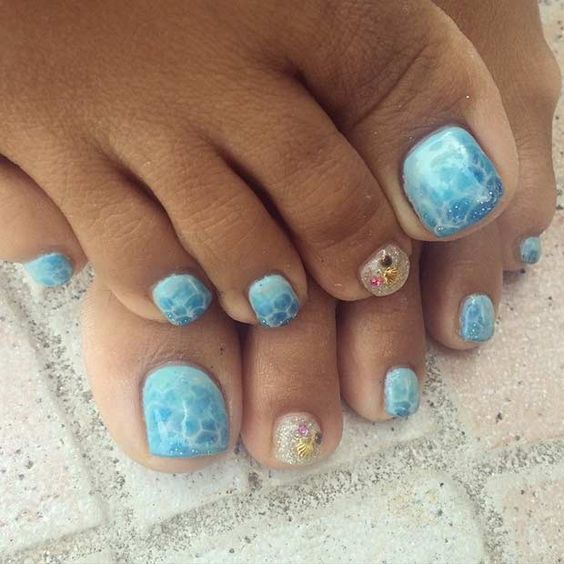
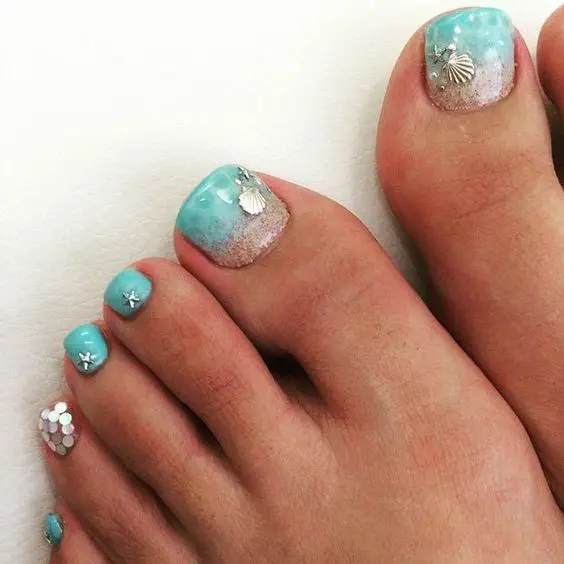
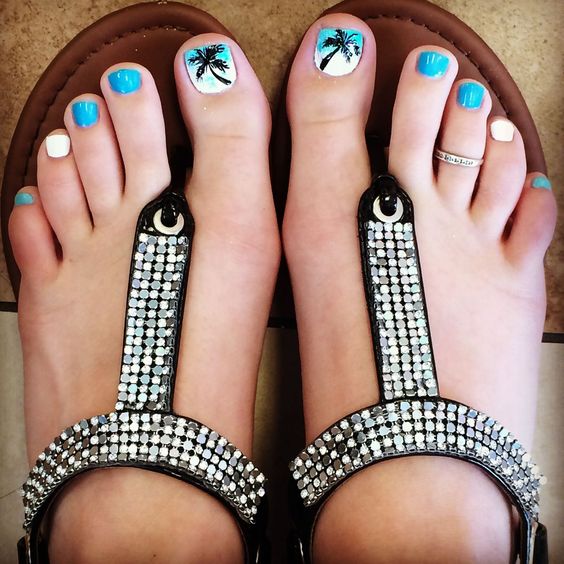
Shades of blue are, obviously, a natural fit. From a light, sky-like blue that reminds you of a clear day, to a deeper, ocean-like blue that brings to mind the sea itself. These colors just make you think of water, and they look particularly striking against tanned skin. Then there are greens, especially those that lean towards turquoise or a seafoam shade. These colors evoke feelings of tropical lagoons and cool, refreshing waves. They have a certain calm about them, which is kind of nice when you are trying to relax.
Coral and bright pinks are also incredibly popular for beach toe nail designs. These colors are lively and cheerful, much like a vibrant sunset or a blooming tropical flower. They add a real pop of warmth and fun. You might also consider sunny yellows or even a very light, sandy beige. These tones can feel a bit more subtle but still perfectly match the environment. It is all about picking a color that makes you feel good and matches the relaxed, happy mood of a beach day. So, you have quite a few options, really, to pick from.
And then there is white. A crisp, clean white can look incredibly chic and fresh against the backdrop of sand and sea. It gives a very clean, polished appearance that feels both modern and timeless for beach toe nail designs. Sometimes, just a simple coat of white is all you need to make a statement. You can also mix and match, perhaps using one color as a base and another for small accents. The possibilities are, honestly, quite broad, letting you express whatever feeling you want to capture.
Simple Yet Stunning Toe Nail Designs Beach Edition
You do not need to be an expert artist to create beautiful toe nail designs for the beach. Some of the most charming looks are actually quite simple to do, even for someone who is just starting out with nail art. It is about using basic shapes and colors to make a big impact. These designs are often quick to apply, which is great when you are eager to get out into the sun. So, let's talk about some easy ideas that still look really amazing.
One very popular and straightforward idea is the classic stripe. You can do a single stripe, maybe a thin line of white or gold, across a base of blue or coral. Or, you could try a few thin stripes in different beachy colors. This look is clean and nautical, and it just screams "beach vacation." All you need is a steady hand or, for a little help, some thin striping tape to get those lines really straight. It is a pretty simple technique, but it gives a very polished finish to your beach toe nail designs.
Another easy option is polka dots. These are just small, round spots of color. You can use a dotting tool, or even the end of a bobby pin, to create perfect little circles. Imagine a light blue base with tiny white dots, like bubbles in the water, or a sandy beige with small, bright coral dots. They add a playful touch without being too complicated. This kind of design is, you know, just really cheerful and fun, perfect for a relaxed setting.
For something a little more subtle but still with that beachy feel, consider a glitter accent. You could paint all your toes a solid color, like a deep sea green, and then add a clear polish with fine glitter over just one toe, perhaps your big toe. This gives a little sparkle, like sunlight on the water, without being over the top. It is a way to add some glam to your beach toe nail designs without much effort at all. Sometimes, less is actually more, especially when you want that effortless beach vibe.
And finally, for a touch of ocean-inspired art, you could try a very simple wave design. This involves using two shades of blue or a blue and white. Paint your nail with the lighter color, and then use a small brush or a toothpick to draw a simple, curved line with the darker shade, suggesting a wave. It does not have to be perfect; a slightly imperfect wave can look quite natural. This kind of design really brings the ocean right to your toes, making your beach toe nail designs truly fitting for the environment.
How to Make Your Beach Toe Nail Designs Last?
Once you have put in the effort to create those lovely toe nail designs for the beach, you want them to stay looking good for as long as possible, right? The beach environment, with its sand, salt water, and sun, can be a bit tough on polish. But there are some things you can do to help your designs stand up to the elements and keep that fresh look. It is pretty much about smart application and a little bit of protection.
The first key step is to use a good quality base coat. This clear layer goes on before any color and helps the polish stick better to your nail. It also acts as a barrier, protecting your natural nail from staining, especially if you are using darker colors. A base coat really creates a good foundation for your beach toe nail designs, helping everything adhere properly. It is a step that many people skip, but it makes a significant difference in wear time.
After applying your color and any designs, a top coat is absolutely essential. This clear layer seals everything in, protecting your design from chips and scratches. Look for a top coat that is specifically designed for long wear or one that offers a gel-like finish for extra durability. Applying a fresh layer of top coat every couple of days, especially if you are spending a lot of time in the water, can really extend the life of your beach toe nail designs. It is like putting a protective shield over your artwork.
When you are at the beach, try to be mindful of how you are using your feet. Digging your toes deep into the sand or kicking at pebbles can, obviously, be pretty harsh on your polish. While you want to enjoy yourself, a little awareness can go a long way. Also, after swimming, gently pat your feet dry rather than rubbing them vigorously. This helps prevent any lifting or smudging of your toe nail designs. Small habits like these can make a big impact on how long your pretty toes last.
Finally, consider using a quick-dry spray or drops after your polish is completely applied. This helps the layers harden faster, reducing the chance of accidental smudges while they are still wet. Even if you think your nails are dry, they might still be soft underneath. A quick-dry product can really speed up that process, letting you get back to your beach fun sooner with your perfect toe nail designs. It is a small investment that offers a lot of peace of mind.
Caring for Your Beach Toe Nail Designs After the Fun
Even after a wonderful day at the beach, your toe nail designs might need a little attention to keep them looking their best for the days that follow. The salt water and sand can be drying, and continuous exposure to sun might affect the polish over time. So, a bit of aftercare can really help maintain that fresh, just-done look. It is about nurturing your nails and skin after they have been out in the elements.
After you have rinsed off the sand and salt from your feet, it is a good idea to apply a moisturizing lotion or cream. This helps to rehydrate the skin around your toes and feet, keeping it soft and supple. Dry skin can make even the most beautiful toe nail designs look less appealing. Pay a little extra attention to your cuticles, perhaps using a dedicated cuticle oil to keep them from drying out and cracking. This small step can make a big difference in the overall appearance of your beach toe nail designs.
If you notice any small chips or wear at the tips of your nails, you can do a quick touch-up. Sometimes, just a tiny dab of the original color, followed by another layer of top coat, can make your toe nail designs look brand new again. This is much easier than removing everything and starting over, especially if you are still on your trip. It is about being proactive and fixing small issues before they become bigger ones, extending the life of your pretty toes.
When it is time to take off your beach toe nail designs, use a gentle, non-acetone nail polish remover. Acetone can be quite drying to both your nails and the skin around them. A gentler formula will remove the polish effectively without stripping away too much natural moisture. Make sure to remove all traces of polish, and then give your nails a little break before applying a new design. This helps keep your nails strong and healthy, ready for your next set of beautiful designs.
The Joy of Having Beautiful Beach Toe Nail Designs
There is a certain feeling of happiness that comes with having your toes looking just right, especially when you are somewhere warm and sunny. It is more than just about appearances; it is about how it makes you feel inside. Having those lovely toe nail designs for the beach can add a little sparkle to your day, a tiny boost of confidence as you walk along the shore. It is kind of a small luxury that pays off in big smiles.
Imagine sitting by the water, maybe with a good book or just enjoying the sounds of the waves, and you glance down at your feet. Seeing a pretty color or a fun design on your toes can just make you feel more relaxed and in the moment. It is a little detail that completes the whole picture of a perfect beach day. It is, you know, about feeling good from head to toe, literally.
Also, beautiful toe nail designs can be a conversation starter. Someone might compliment your choice of color or ask about your design, which can be a nice way to connect with others. It is a simple way to express your personal style and show a bit of your personality, even in a casual setting. So, it is not just for you; it can also bring a little bit of joy to those around you, which is pretty neat.
Ultimately, taking the time to do your toe nail designs for the beach is a form of self-care. It is a moment to focus on yourself, to be creative, and to prepare for a time of relaxation and fun. That feeling of anticipation, and then the satisfaction of seeing your vision come to life on your toes, is quite rewarding. It is a small gesture that contributes to a much larger feeling of well-being and enjoyment during your beach escape.
Choosing the Right Tools for Your Beach Toe Nail Designs
Having the right tools can make a big difference when you are creating your toe nail designs for the beach. You do not need a huge collection of fancy gadgets, but a few basic items can really help you get a neat and professional-looking finish. It is about having the things that make the process easier and more enjoyable. So, let's talk about what you might want to have on hand.
First up, good quality nail clippers and a nail file are pretty much essential for shaping your nails. Look for clippers that feel comfortable in your hand and cut cleanly without tearing the nail. A fine-grit nail file will help you smooth the edges and corners without causing damage. These basic shaping tools are the foundation for any good toe nail designs, ensuring a clean base for your work.
For applying polish, a good brush is key. Most polish bottles come with a brush, but if you are doing more intricate designs, a separate set of small, thin brushes can be very helpful. These are great for drawing lines, dots, or other small details. You can find them in art supply stores or beauty shops. Having different brush sizes gives you more control over your beach toe nail designs, letting you get those fine touches just right.
A dotting tool is another simple but very useful item. This is basically a stick with a small, rounded metal ball at the end. It is perfect for creating perfectly round dots of various sizes, which are great for polka dot designs or for adding small accents. They are very easy to use, even for beginners, and they open up a lot of possibilities for playful toe nail designs for the beach. It is a small investment that offers a lot of creative freedom.
Finally, a good quality top coat and base coat are, as we talked about, pretty much indispensable. These are not just for protection; they also help your colors look more vibrant and smooth. A clear polish that dries quickly is a bonus. Having these basic tools means you are well-equipped to create and maintain lovely toe nail designs that will look great on any sandy shore. It is all about making the process as smooth as possible.
Final Thoughts on Your Beach Toe Nail Designs
So, when you are getting ready for your next trip to the coast, remember that your toe nail designs can be a fun and easy way to add to that whole sunny, carefree vibe. It is about picking colors that make you happy, trying out simple patterns that reflect the beauty of the sea, and taking a little time to make your feet feel special. From preparing your nails with a good soak and trim, to choosing vibrant shades of blue or coral, every step helps create a look that is just perfect for sandy shores.
Keeping your designs looking good with a solid base and top coat, and being a little gentle with them while you are enjoying the water, will help them last through all your beach adventures. And when the fun is done, a bit of moisturizing and gentle removal keeps your nails healthy for your next creative session. It is, you know, a small detail that brings a lot of joy and adds to that overall feeling of being truly ready for some relaxation by the ocean. It is pretty much about embracing the whole experience, right down to your toes.
Related Resources:
Detail Author:
- Name : Mossie Wintheiser
- Username : dbauch
- Email : aglae.kuhic@schaden.net
- Birthdate : 1994-08-27
- Address : 7136 Torphy Street Suite 110 East Wilburn, ID 44298-1057
- Phone : +14584916752
- Company : Wehner, Denesik and Emard
- Job : Hairdresser OR Cosmetologist
- Bio : Aut rerum dolorem officia ut voluptatum perspiciatis. In aperiam doloremque voluptates cupiditate. Nihil vel corporis qui sapiente voluptate cupiditate. Impedit ut voluptas ad laboriosam dolores.
Socials
tiktok:
- url : https://tiktok.com/@kathryn_haag
- username : kathryn_haag
- bio : Dolores aut dolor aut eaque eligendi. Voluptas modi molestias voluptatum enim.
- followers : 2872
- following : 2929
instagram:
- url : https://instagram.com/kathryn7356
- username : kathryn7356
- bio : Iste earum corporis facilis sint. Nobis amet aut et magnam dolorem nesciunt.
- followers : 3398
- following : 852
twitter:
- url : https://twitter.com/haagk
- username : haagk
- bio : Qui aliquam consequatur rerum facilis. Consequatur molestias quia earum laborum. Dolorum quo iste facere ducimus. Quis qui quisquam qui et.
- followers : 6129
- following : 777
facebook:
- url : https://facebook.com/khaag
- username : khaag
- bio : Praesentium voluptas sunt necessitatibus quas iusto.
- followers : 3150
- following : 2218
linkedin:
- url : https://linkedin.com/in/kathrynhaag
- username : kathrynhaag
- bio : Impedit inventore repellat dolor.
- followers : 3971
- following : 2579
